Posts

Showing posts from 2016

Creating a Webpage

The Process First we had to download and unzip a zip file from the server. Then we had t open it in Dreamweaver and begin creating the website. The first thing we did was enter a photo we took. The we entered our elevator pitch and created a menu bar. Then we added a date that would update every time we edited the website. Then we added links to stuff like our blogs and our you tube channels and such. Then we created our projects page and entered a video and a GIF we did from quarter one and quarter two. Lastly we changed the entire color scheme of the website and changed the font. How Long? This project took a long time. I used my time very wisely in class. The videos were split up into fifteen minute segments. I usually got around two of them done per day. I was sick on Thursday and I got caught up in one class period. Although it did not take me very long to finish the project other people took longer because their computers were malfunctioning. Any Challenges? I face

9 quarter 2 reflection

1. I am really good at using the six shot system. I find that in almost all of my videos I have all six shots. It helps to make a very good video. Another strength is I am really good at editing quickly under pressure. 2. I need to add more rule of thirds. I noticed a lot of my shots had the people in the middle instead of off to the side. I all need to have more shots in my video. All my videos ended up being just a little bit shorter than what they should be. 3.I love working with new people. It was really fun to collaborate with other people in the class. It created a much stronger bond than before. 4. I would have taken the critiques more seriously so I could create better videos. 5.I learned that it is ok to step out of your comfort zone. At the beginning of the semester I was very shy. Now I am very confident and much happier than before. 6. My goal is to create amazing thing in graphic design. I am going to try really hard in that class and do the best

Tutorial Blog

How to take audio out of your clips Today i will each you how to delete audios from clips. Because this is the only thing I know how to do. After you have made your video and put it on the timeline you will see two sections. The one on top is the view and the one on bottoms the audio. Right click on the clip you want to take audio out of. Click unlink and then the boxes are now separate all you have to do is select all the audio files. Then all you have to do is delete them.

AB sequence

Image
The process Right after we got our groups for this project we went straight to work. It took my group longtime to finish the story board because we had no idea what we were going to put in our video. After arguing of several minutes about who would be the designated artist we got to work. We decided to make a video about exchanging memes. It took us a long time to finish our storyboard because we didn't have enough shots. Eventually we created enough shots and we were ready to begin our video. Filming The filming process was really difficult. We could never agree on certain angles. We disagreed on location and other things. Not everyone got a say in what we did. It was not very fair. But other than those things the filming process was fun. It was fun to do little stunts with my partners. We had trouble finding a third person to be in our video but eventually we go someone and it ended up really good. Editing The editing process was not very fun. My video has no sound

Six Shot System

Image
The Pre-Production Before we made the video we had to figure out what our video was going to be about. Just like before you start building a house you need blueprints. We filled out a story board. The storyboard had squares and in each square we would draw each scene. It was really helpful because it helped me make sure I had all six shots in my video.  I did not enjoy the drawing part though because I am really bad at drawing. The Production After I figured out who was going to be in my group I started filming. The filming process was really fun. The whole filming process went very smoothly. I only had to reshoot two scenes. It was really fun collaborate with other people. I liked sharing ideas with them. I was having trouble getting one of my scenes set up and they immediately helped. There was nothing I didn't like about the shooting process.  Editing After we were done shooting we began editing. To edit we used adobe premier. It was a program I had never heard of b

Six Shot System

Image
What is the Six Shot System? Close Up of the Hands We use this photo to show what the person is doing with their hands Face Close Up We use this shot to show what the subject is feeling. Over the shoulder This one we do so we can see exactly what the person is doing and adds some perspective. Medium Shot This shot is where you can only see from the waist up Wide Shot This shot shows what the subject is dong with their whole body Extreme Wide Shot This shows what the person is doing rom a far away angle. We use this shot because it shows the setting.

Reflection

What I Learned Today we read a paper about social media. I was really surprised that not all colleges look at social media. But sometimes they do. Sometimes they really like the students grades and they have really high ACT scores, but their social media is inappropriate. So the college will tun that student down because of what they said on social media. They sad when a student deletes something negative they said it will only make it worse for them in the long run. What I Will Do Differently I do not post bad things on social media. But I will continue to post appropriate stuff. I always pause before I post and think if it could possibly hurt someones feelings. I will also make sure my friends are posting appropriate things. That way we can create a positive internet environment. If I continue to post appropriate things it will make my life much easier in the future.

Elevator Page

Hi im Katie Conley a student at ONW. I have expertise in vounteer work. I am constantly vounteering at organizations and events so i can make the world abetter place. I have received a letter from the President thanking me for doing over two hundred hours of volunteer work.Once I start working on project I don't stop until its done. No matter how hard the task is I never give up. I have a lot of expertise when it comes to hard work. I always put in one hundred percent of my effort to everything I do.

My house

Image
My House This is the first house I made in Sketchup. It was really fun to make, but really hard at the same time. Because you have to draw every single little line. You have to make everything the same height. You have to make sure everything is the right measurement. I liked it a lot though. It was cool to see how much progress I made on my house in such a short amount of time. Although I am still not finished with the house. I didn't get the chance to make the porch it needed but i still like it. This is my house.

My 10 strengths animation

Image
The Project We stated working on this animation weeks ago. We started by figuring out what out ten strengths were. Then we began the project. On the first day we chose a picture that was not copyrighted to be our background. Then we spent a whole day and a half figuring out how we wanted our words to look. We had to put them in an organized fashion so they don't look like a jumble of words.  Then we've spent the past two days animating the video. But this time we used the video timeline instead of using the create frame animation timeline. I think it made this project a lot easier. I finished the animation faster. What Did I Learn? I learned a fair amount. I knew how to use a lot of the tools because I make youtube videos. The software I use was very similar to photoshop. I learned how to add hue and saturation into the original photo. I also learned how to add the hue and saturation into the photo in the video. If that makes any sense.  I learned about levels and how to us

My Second Animation

Image
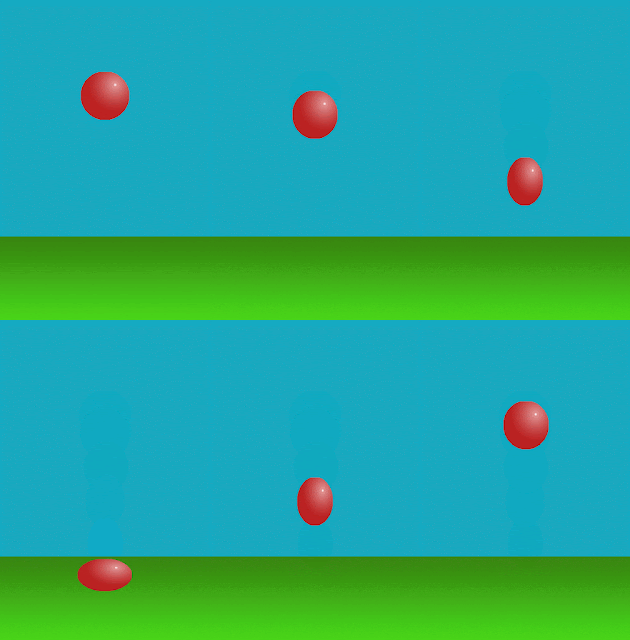
Making My Second Animation For the past week i have been creating my second animation. It was alt easier than the other one. Because this time i knew what i was doing and didn't have to ask the teacher. I felt really cool. Anyways in many was this project was easier but it was also really difficult at the same time. The Process On the first day we learned about arcs and we learned how to make it look right. The arcs worked as a guide to know where I should bounce the ball. It also made my animation look more realistic. No everything moves in a straight like they move in arcs. Watch this video to better understand Arcs What I Learned About Photoshop I learned a lot of new things about Photoshop this week. I learned that if you take a color or a frame you can tween it with the next frame. For example if you tween frame A and frame B then when you tween it there will be 20 frames between frame A and B. I also learned that you can add your name to any animation so that people

My First Animation.

Image
The Process of My first Animation This week i began working on my first animation. It was really hard for me. I have a horrible memory so it was hard for me to remember every little thing that we had to do. It was really cool learning the new software. Even though the software was difficult to wok with at times I still had fun. On the first day of animation we began to create the layers. On the second day we put the layers on the timeline. Which was really difficult for me to do. On that same day we animated it. The last thing we did was save it for the internet so that anyone can view it. What I learned I learned a lot this week. I had no idea you could create animations with photoshop. I thought you had to draw out every animation by had and upload them to the computer. I also learned that there are many different ways you can save something as. I learned that you cant open up certain files on some computers. I learned about Squash and Stretch. Which is where you make your anim

Sidewalk Chalk Team Flags Experience

Image
Over the past few days I have been working on my first high school project. The project was where you were paired with a group of people you don't know. Then you come up with a design for your team flag. Everyone has to draw a symbol that represents themselves. The symbol has to be colored in using a color that represents their personality. For example red represents love and emotion and Green represents freshness and fertility. On the first day we were paired with each other and began brainstorming ideas for our flag. We all had different ideas for our flag. So it was hard to come up with an idea that everyone liked and could agree on. I suggested that we do a tree and on each branch we could have our symbol The people in my group loved the idea and we sketched the tree util it was time for the next hour. The second day was much easier than the first. We all chose our symbol and sketched it on top of the tree. My symbol was a cow because cows are amazing and i love them, b